One of the greatest features of a digital camera is its ability to give us instant feedback. By reviewing your images on the camera’s LCD screen, you can instantly tell if you got your shot. This visual feedback allows you to make adjustments on the fly.
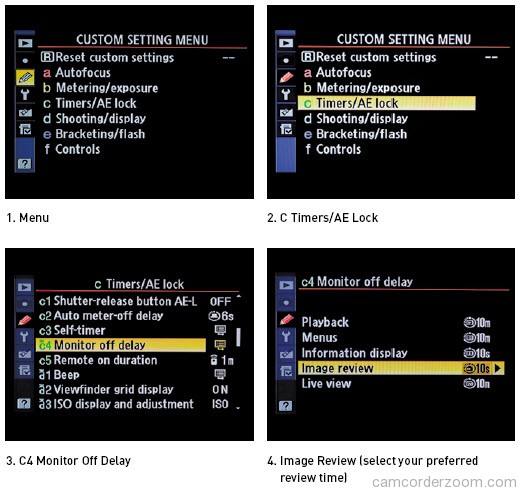
When you first press the shutter release button, your camera quickly processes your shot and then displays the image on the LCD. The default setting for that display is four seconds. Four seconds works for me, but if you want to increase the amount of time you have to view a shot, such as up to 10 seconds, you can do that.
There are two default display modes that give you different amounts of information while reviewing your photos. The default view (Figure 1.7) simply displays your image along with the image filename, date, time, and image quality setting.
To get more visual feedback, press the Multi-selector up to display the second display view called Overview Data (Figure 1.8). This view mode not only displays the same information as the default view, but also includes camera settings such as aperture, shutter speed, lens length, white balance, exposure compensation, shooting mode, ISO, white balance setting, picture style, quality setting, any compensation settings, the active color space, picture control, and the D-Lighting setting. The other noticeable item will be the histogram, which gives you important feedback on the luminance values in your image.

You probably won’t want to use this display option as your default review setting because the image thumbnail is so small, but if you are trying to figure out what settings you used or if you want to review the histogram (see “The Value of the Histogram” sidebar), you now have all of this great information available.
There are other display options that must be turned on using the camera menu.
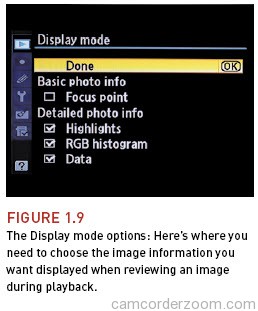
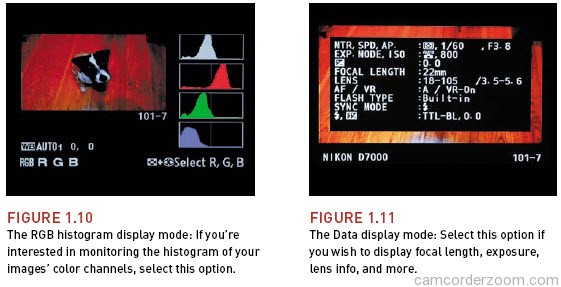
These can be found in the Playback menu under the Display mode option (Figure 1.9). With this menu option you can add display modes such as Highlights, RGB histograms (Figure 1.10), and additional camera data (Figure 1.11). I personally don’t use the RGB histogram and Data settings because they don’t offer me any visual information that I find critical during a photo session. I do, however, always have the Highlights option turned on so that I can make sure I’m not clipping any information from my image highlights.
Deleting images
Deleting or erasing images is a fairly simple process that is covered on page 47 of your manual. To quickly get on your way, simply press the Image Playback button and use the Multi-selector to find the picture that you want to delete. Then press the Trash button located on the back of the camera to the left of the eyepiece. When you see the confirmation screen, simply press the Trash button once again to complete the process.
Caution: Once you have deleted an image, it is gone for good. Make sure you don’t want it before you drop it in the trash.
The value of the histogram
Simply put, histograms are two-dimensional representations of your images in graph form. There are two histograms that you should be concerned with: the luminance and the color histograms. Luminance is referred to in your manual as “brightness” and is most valuable when evaluating your exposures. In Figure 1.12, you see what looks like a mountain range. The graph represents the entire tonal range that your camera can capture, from the whitest whites to the blackest blacks. The left side represents black, and all the way to the right side represents white. The peaks represent the number of pixels that contain those luminance levels (a tall peak in the middle means your image contains a large amount of mediumbright pixels).
Looking at this figure, it is hard to determine where all of the ranges of light and dark areas are and how much of each I have. If I look at the histogram, I can see that the largest peak of the graph is in the middle and trails off as it reaches the edges. In most cases, you would look for this type of histogram, indicating that you captured the entire range of tones, from dark to light, in your image. Knowing that is fine, but here is where the information really gets useful.
A histogram that has a spike or peak riding up the far left or right side of the graph means that you are clipping detail from your image. In essence, you are trying to record values that are either too dark or too light for your sensor to accurately record. This is usually an indication of over- or underexposure. It also means that you need to correct your exposure so that the important details will not record as solid black or white pixels (which is what happens when clipping occurs).

There are times, however, when some clipping is acceptable. If you are photographing a scene where the sun will be in the frame, you can expect to get some clipping because the sun is just too bright to hold any detail. Likewise, if you are shooting something that has true blacks in it—think coal in a mine shaft at midnight—there are most certainly going to be some true blacks with no detail in your shot. The main goal is to ensure that you aren’t clipping any “important” visual information, and that is achieved by keeping an eye on your histogram.
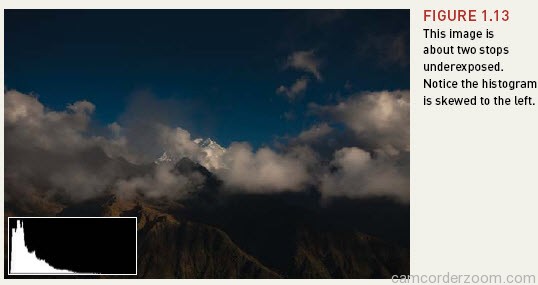
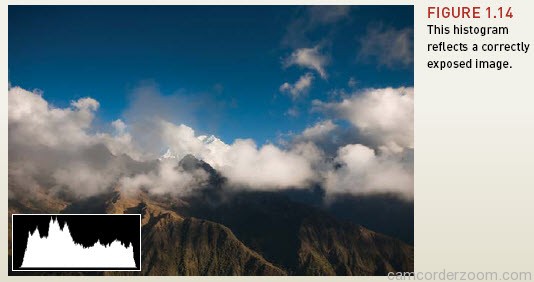
Take a look at Figure 1.13. The histogram displayed in the image shows a heavy skew toward the left with almost no part of the mountain touching the right side. This is a good example of what an underexposed image histogram looks like. Now look at Figure 1.14 and compare the histogram for the image that was correctly exposed. Notice that even though there are distinct peaks on the graph, there is a fairly even distribution across the entire histogram.