


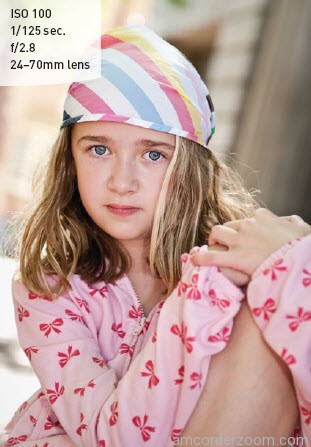
When you look at a person, probably the very fi rst thing you notice is their eyes—it’s just natural to make eye contact with other people, and we even do this with pets and other animals. This is extremely important when taking photographs because you want to be sure that your focus is on your subject’s eyes (Figure 4.8). Also keep in mind that if the person is positioned at an angle, it’s best to focus on the eye that is
nearest the camera, since that’s where we naturally tend to look fi rst (Figure 4.9).

the different focusing points you can use with your 7D. In my experience, the best option for portrait work is Single-Point AF. You can move the focus around within your viewfi nder to fi nd the eye, ensuring that you are focusing on the proper part of the image before taking your photo. Leaving the focusing decision up to the camera means you could end up with an in-focus nose and blurry eyes, or, even worse, it might try to focus on the background instead of the person.
FOCUSING TIP FOR PORTRAIT WORK
When focusing on your subject’s eyes, do your best to focus on the iris—the colored part of the eyeball. This is especially important if you are doing a very close-up portrait where the person’s face fills most of the frame, since the focus area will be much more noticeable.
Sometimes, if you’re shooting with a large aperture and have shallow depth of field, it’s easy to miss focus and instead have the eyelash in focus and the eyeball a bit blurry.
SETTING YOUR FOCUS TO A SINGLE POINT

- Press the AF Point Selection button (A) and look in your viewfi nder.
- Press the M.Fn button on the top of your camera, located next to the Shutter button (B), until you see the setting with one small red square inside the viewfi nder.
- Use the Main dial, the Multi-Controller, or the Quick Control dial to set the location of your focus point. I prefer to use the Multi-Controller because it acts like a joystick, and it’s easier to place the focus point where I need it.
I typically set the focus point location in the middle, fi nd my subject’s eye, and press the Shutter button halfway to set focus. With my fi nger still holding the shutter halfway down, I recompose and take my photo. I fi nd that the “focus and recompose” method is a much quicker way to photograph people. Speed is important because people tend to move around during the shooting process, and keeping the focus point in the middle simplifi es my shooting.
CATCHLIGHT
A catchlight is that little sparkle that adds life to the eyes (Figure 4.10). When you are photographing a person with a light source in front of them, you will usually get a refl ection of that light in the eye, be it your fl ash, the sun, or something else brightly refl ecting in the eye. The light refl ects off the surface of the eyes as bright highlights and serves to bring attention to the eyes. Larger catchlights from a refl ector or studio softbox tend to be more attractive than tiny catchlights from a fl ash.
