Creating silky-looking images of streams, waterfalls, and even waves adds a beautiful touch to any landscape photo (Figure 5.15). Applying this effect to your images is simple—it’s just a matter of using a very slow shutter speed to blur the water as it fl ows through your image. Of course, you’ll need to place your camera on a tripod, and it’s also a good idea to attach a cable release to prevent any potential camera shake when pressing the Shutter button. To achieve a great effect, use a shutter speed of at least 1/15 of a second or longer.
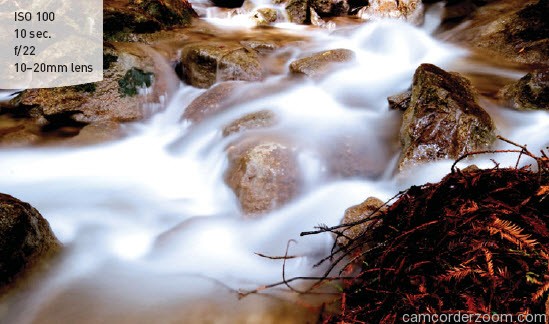
SETTING UP FOR A FLOWING WATER SHOT
- Attach the camera to your tripod, and then compose and focus your shot.
- Make sure the ISO is set to 100.
- Using Av mode, set your aperture to the smallest opening (such as f/22 or f/36).
- Press the Shutter button halfway so the camera takes a meter reading.
- Check to see if the shutter speed is 1/15 or slower.
- Take a photo and then check the image on the LCD Monitor.
When creating fl owing water images, be sure to enable the Highlight Alert. Then check the water areas in the image on the LCD Monitor; if the water is blinking on the LCD, indicating that the scene is overexposed, you’ll need to adjust the exposure compensation to underexpose the scene slightly and bring back the shadow details in the water.
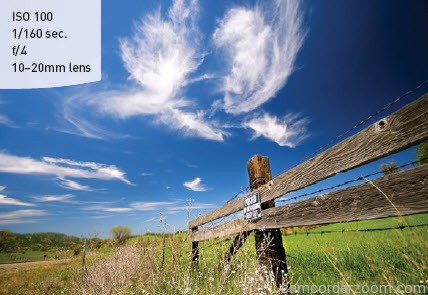
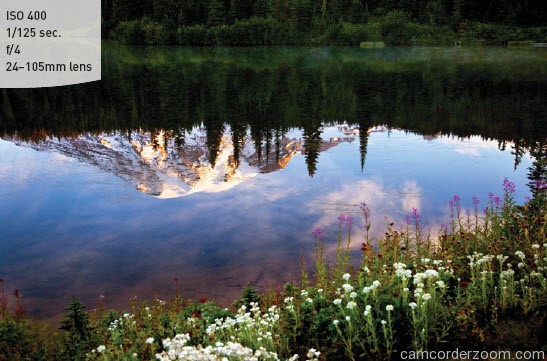
It’s possible that the light in the area in which you want to create this effect is too bright and won’t allow you to use a slow enough shutter speed to effectively blur the water. In this case, you can use a fi lter—either a polarizing fi lter or a neutral density fi lter—to help reduce the amount of light that is coming through the lens. The polarizing fi lter redirects wavelengths of light to create more vibrant colors, reduce refl ections, and darken blue skies. It’s a handy fi lter for landscape work (Figures 5.16 and 5.17). The neutral density fi lter is typically just a dark piece of glass that serves to darken the scene by several stops. This allows you to use slower shutter speeds during bright conditions.