Color balance correction is the process of rendering accurate colors in your final image. Most people don’t even notice that light has different color characteristics because the human eye automatically adjusts to different color temperatures—so quickly, in fact, that everything looks correct in a matter of milliseconds.
When color film ruled the world, photographers would select which film to use depending on what their light source was going to be. The most common film was balanced for daylight, but you could also buy film that was color balanced for tungsten light sources. Most other lighting situations had to be handled by using color filters over the lens. This process was necessary for the photographer’s final image to show the correct color balance of a scene.
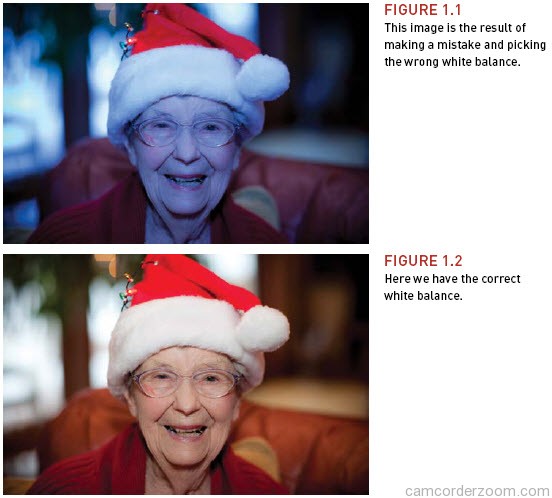
Luckily, you don’t need to have a deep understanding of color temperatures to control your camera’s white balance (Figures 1.1 and 1.2). The choices are given to you in terms that are easy to relate to and that will make things pretty simple.
Your white balance choices are:
- Auto: The default setting for your camera. It is also the setting used by all of the automatic scene modes.
- Daylight: Most often used for general daylight/sunlit shooting.
- Shade: Used when working in shaded areas where sunlight is the dominant light source.
- Cloudy: The choice for overcast or very cloudy days. This and the Shade setting will eliminate the blue colorcast from your images.
- Tungsten: Appropriate for any occasion when you are using regular householdtype bulbs for your light source. Tungsten is a very warm light source and will result in a yellow/orange cast if you don’t correct for it.
- Fluorescent: Gets rid of the green-blue cast that can result from using regular fluorescent lights as your dominant light source. Some fluorescent lights are actually balanced for daylight, which would allow you to use the Daylight white balance setting.
- Flash: Used whenever you’re employing the built-in flash or a flash on the hot shoe. You should select this white balance to adjust for the slightly cooler light that comes from using a flash. The hot shoe is the small bracket located on the top of your camera, which rests just above the eyepiece. This bracket is used for attaching a more powerful flash to the camera
- Pre: Indicates that you are using a customized white balance that is adjusted for a particular light source. This option can be adjusted using an existing photo you have taken or by taking a picture of something white or gray in the scene.
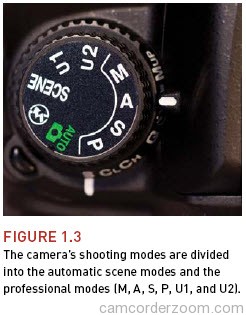
Your camera has two different “zones” of shooting modes to choose from. These are located on the Mode dial, which separates your choices into automatic scene modes and what I refer to as the professional modes. None of the automatic modes, which are chosen by turning the Mode dial to Scene and then rotating the Command dial to choose a particular mode, allow for much customization, including white balance. The professional modes, defined by the letter symbols M, A, S, P, U1, and U2, allow for much more control by the photographer (Figure 1.3).
Setting the white balance
- After turning on or waking the camera, select one of the professional shooting modes such as P (you can’t select white balance when using any of the automatic modes).
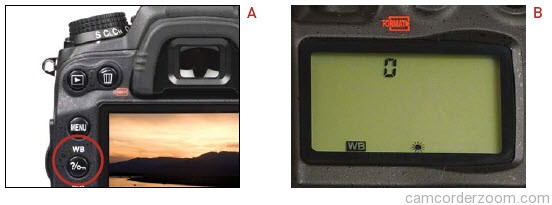
- Press and hold the WB button (A) on the back of the camera to activate White Balance, visible on the control panel or rear LCD.
- While pressing the WB button, use your thumb to rotate the Command dial to the appropriate White Balance setting, and release it to make your selection (B).