


You’ll probably want to capture your image with a proper white balance, and with landscapes your options (such as the Daylight and Cloudy settings) are more straightforward than with some other types of photography. If you’re shooting in RAW, you have some leeway when selecting the white balance in-camera, because it’s easy to change it non-destructively after the fact. But my philosophy is that it’s always best to get things right in-camera.
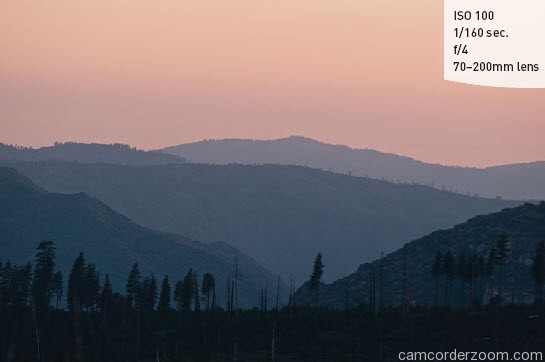
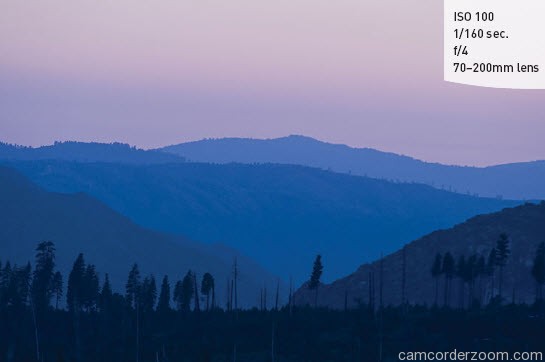
Just because there is a “correct” white balance for each scene doesn’t necessarily mean that you need to stick with that setting. Try experimenting with different white balance settings to give your landscape images new looks. Changing the white balance in an image can even give the feel of photographing a landscape at different times of day (Figures 5.8 and 5.9).
WARM AND COOL COLOR TEMPERATURES
These two terms are used to describe the overall colorcast of an image. Reds and yellows are said to be warm, which is the look that you usually get from the late afternoon sun. Blue is usually the predominant color when talking about a cool cast.
I really like to use Live View to make changes to some of the settings, such as white balance. We discussed this feature in Chapter 1, but did you know that you can also use the same method to change your Picture Style settings? You may already realize that the likely picture style to use is Landscape, but maybe you want to try out some of the other styles or make detailed changes to their settings and see how it affects your image. Using Live View is an excellent way to preview those changes even before you take your fi rst shot.
USING LIVE VIEW TO PREVIEW DIFFERENT PICTURE STYLE SETTINGS
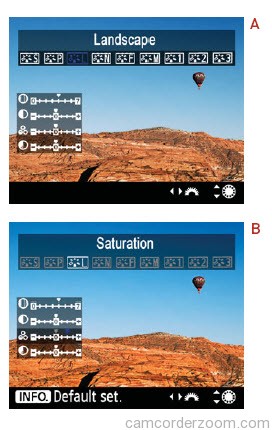
- Make sure the Live View shooting button is set to the white camera, and then press the START/STOP button.
- With Live View activated, press the Picture Style Selection button to the left of the LCD Monitor.
- Use the Main dial on the top of the camera to select among the different base picture style choices (A).
- Once you’ve selected a picture style, you can change any of its four parameters by using the Quick Control dial to
scroll among them (sharpness, contrast, saturation, and color tone). Once you’ve selected a parameter, use the Main dial to adjust its settings (B). - Press the Set button to lock in your changes.