


Digital photography has opened up a whole new world when it comes to setting the ISO speed on your camera. With a fi lm camera you were bound to whatever fi lm speed you loaded in your camera or carried with you in your camera bag, but with a digital camera you can adjust the ISO on the fl y, depending on your lighting conditions.
The ISO setting in your camera is the baseline that helps determine your aperture and shutter speed settings. It allows you to choose the camera sensor’s level of sensitivity to light. It also makes a big difference in image quality. With a fi lm camera, the ISO is also called “fi lm speed,” and the higher the ISO number, the grainier your images will be. With digital photography, that grain is referred to as “digital noise,” but the principle is the same—the higher the ISO number, the more digital noise you will see in your image. As I mentioned earlier, digital cameras offer an amazing amount of fl exibility when it comes to setting your ISO. This is very useful, but it can affect the quality of your images if you set the ISO too high.
Which ISO you choose depends on your level of available, or ambient, light. For sunny days or very bright scenes, use a low ISO such as 100 or 200. As the level of light is reduced, raise the ISO level. Cloudy days or indoor scenes might require you to use ISO 400. For low-light scenes, such as nighttime shots, you’ll need to bump up that ISO to 1600. The thing to remember is to shoot with the lowest setting possible for maximum quality.
There is also the option to set your ISO using the Auto ISO feature. I use this from time to time, but I don’t recommend new photographers use this feature until they have a strong grasp of how aperture, shutter speed, and ISO work together to produce a proper exposure. While quite powerful at times, Auto ISO can be confusing if you are not sure what your camera is doing.
SETTING THE ISO
- Activate the camera by lightly pressing the Shutter button.
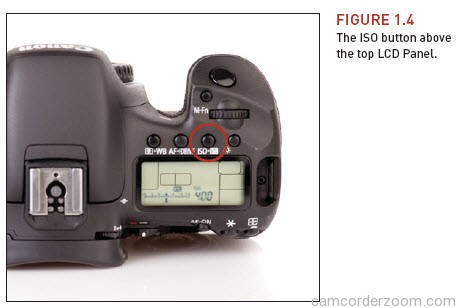
- Press the ISO button on the top of the camera (Figure 1.4).
- Use the Main dial to select an ISO between 100 and 6400.
- Lightly press the Shutter button again to lock in your change.
SET YOUR ISO ON THE FLY
You can also change the ISO without taking your eye from the viewfinder by following the same steps as above. When you press the ISO button, you will see all of the camera settings in the viewfinder disappear, leaving just the ISO information viewable. Once you press the Set button, your new ISO setting will display along with the regular shooting
data. This will get easier to do as you become more familiar with the camera buttons.
You can also take advantage of the camera’s Quick Control button. This feature allows you to change settings, such as shutter speed, aperture, and ISO (Figure 1.5), while looking at the LCD Monitor on the back of the camera.

NOISE
Noise is the enemy of digital photography, but it has nothing to do with the loudness of your camera operation. It refers to the electronic artifacts that appear as speckles in your image. They generally appear in darker shadow areas and are a result of the camera trying to amplify the signal to produce visible information. The more the image needs to be amplified—raising the sensitivity through higher ISOs—the greater the amount of noise will be.